You can change the name on your QESCO electricity connection online with a few easy steps. If you bought a new house or need to update the name for any reason, this simple guide will help you do it quickly and without trouble. Just follow the steps below.
9 Steps To Change The Connection Name
Here is an easy step-by-step guide to change the name on your QESCO electricity connection:
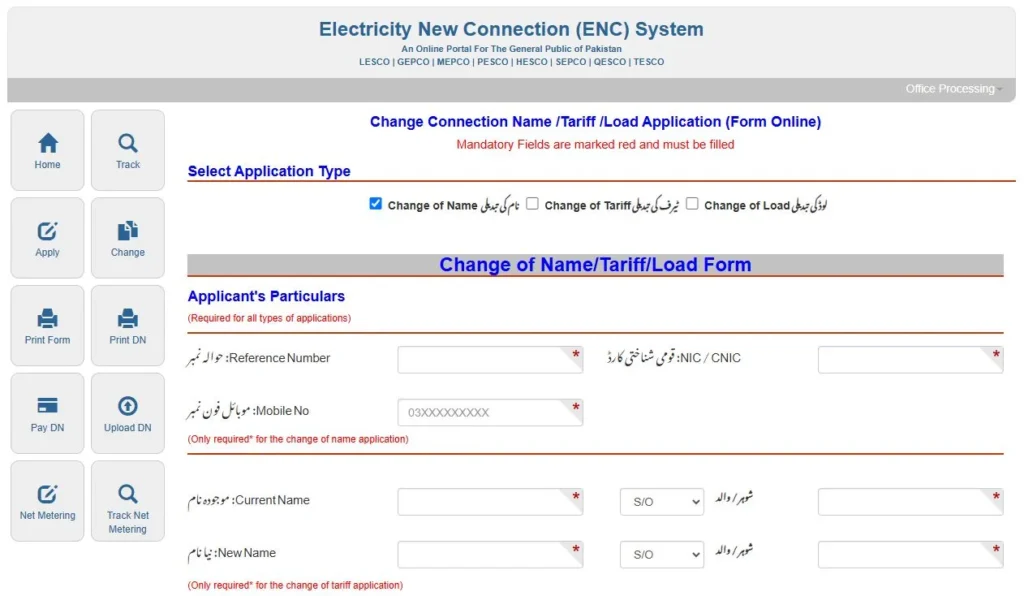
Step 1: Visit the Official Website
The first step to change your QESCO connection name is to visit the official website. Open your internet browser and go to https://enc.com.pk. This is where you can start your request and check its progress.
Step 2: Access The Change Name Option
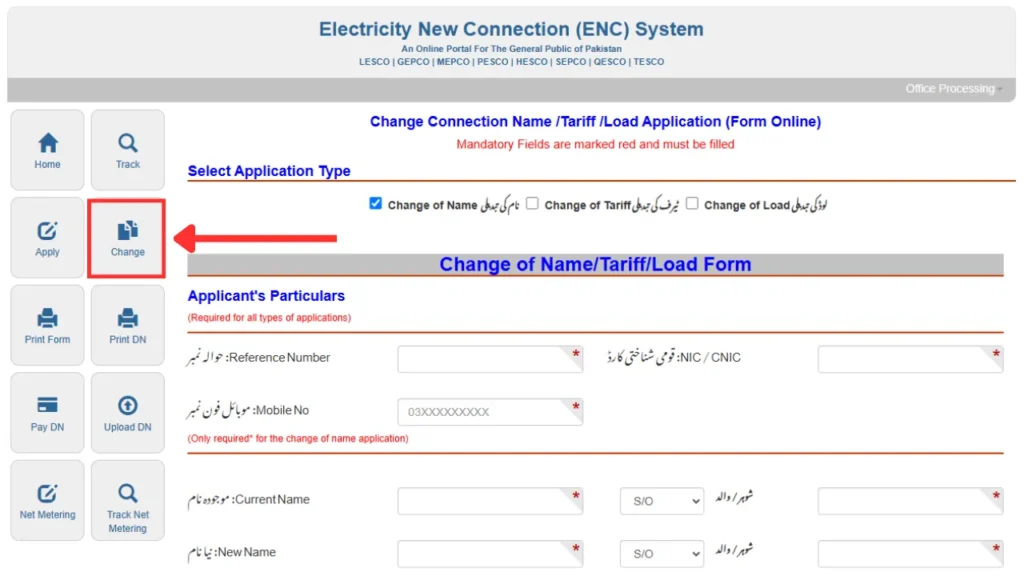
When you open the website, look at the left side of the screen. You’ll see different service options. Find the “Change” button for name change requests and click it to start your application.
Step 3: Select Application Type
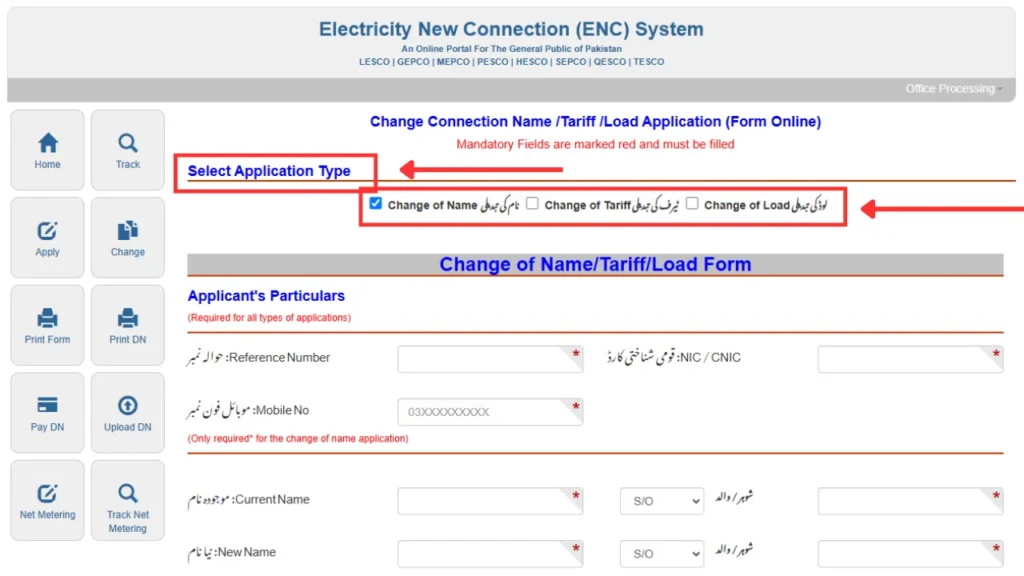
After you click the change button, you’ll be asked to choose the type of application. You will see three options. Select “Change of Name” because you want to update the name on your electricity connection. This helps QESCO know what your request is about.
Step 4: Enter Your Details
To continue, you need to give correct personal and connection details. These include:
- Reference Number: You can find this number on your electricity bill. It helps QESCO find your account.
- CNIC Number: Enter your National ID Card number to confirm who you are.
- Mobile Number: Give your active mobile number so you can get updates about your application.
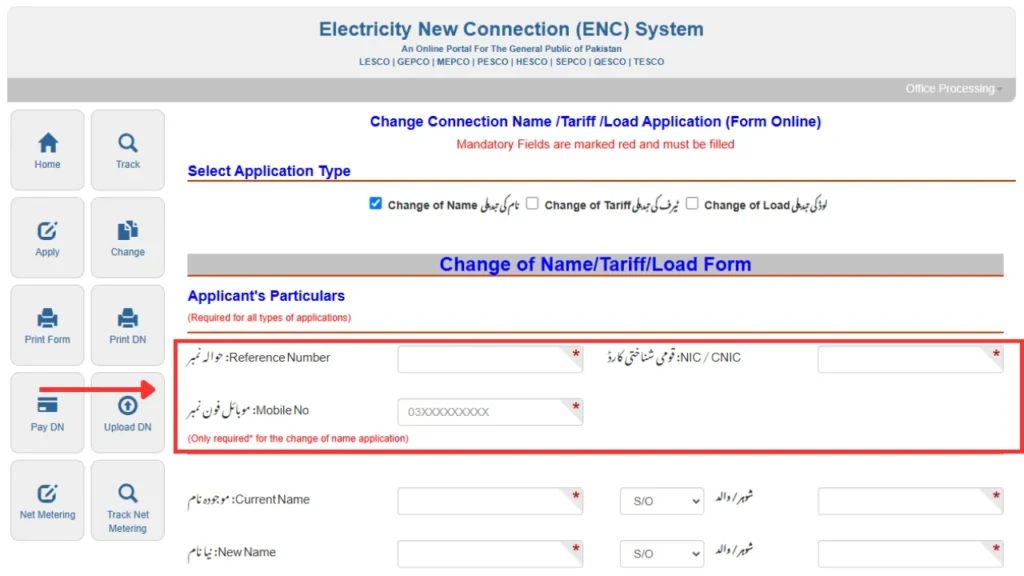
Make sure all the information you entered is correct before going to the next step. If there are any mistakes, it could slow down your request.
Step 5: Provide Current and New Name Information
Now, fill in the details for both the old and new names on the connection. This includes:
- Current Name: The name already linked to the electricity connection.
- Current Father/Husband’s Name: The father or husband’s name already on record.
- New Name: The new name you want to add to the connection.
- New Father/Husband’s Name: The father or husband’s name for the new person.
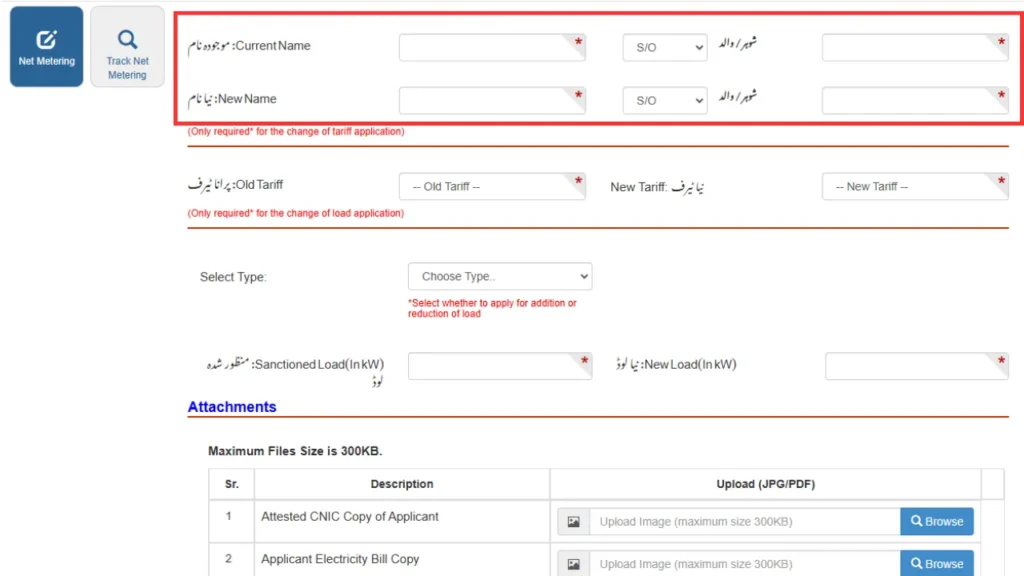
It’s important that all these details match your official ID documents. This will help avoid any problems or delays in your application.
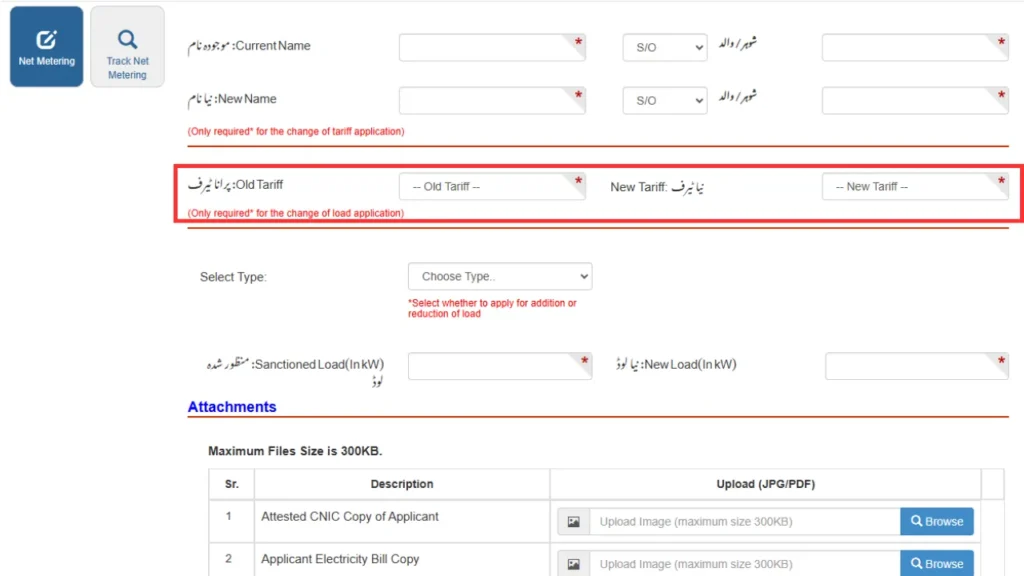
Step 6: Select Tariff Details
In this step, choose the type of connection you currently have and the one you want to switch to. These are called tariff categories and they affect how your bill is calculated. Make sure to pick the correct options to avoid problems later.
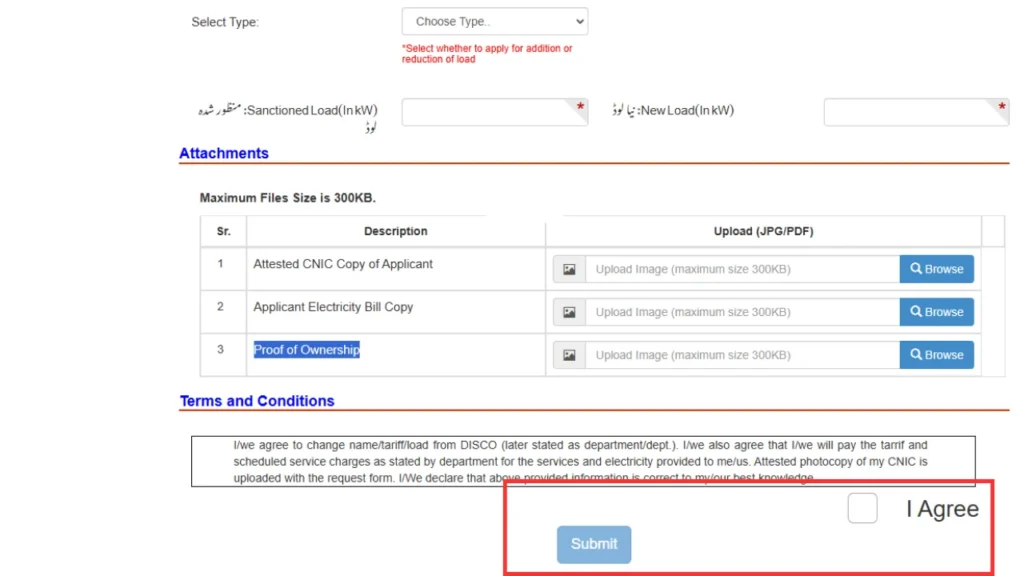
Step 7: Specify Load Changes (If Applicable)
If you want to change the approved electricity load for your connection, you can do it in this step. From the dropdown menu, choose if you want to increase or decrease the load. Then fill in:
- Current Load (in kW): The power you are allowed to use right now.
- New Load (in kW): The power you want to use in the future.
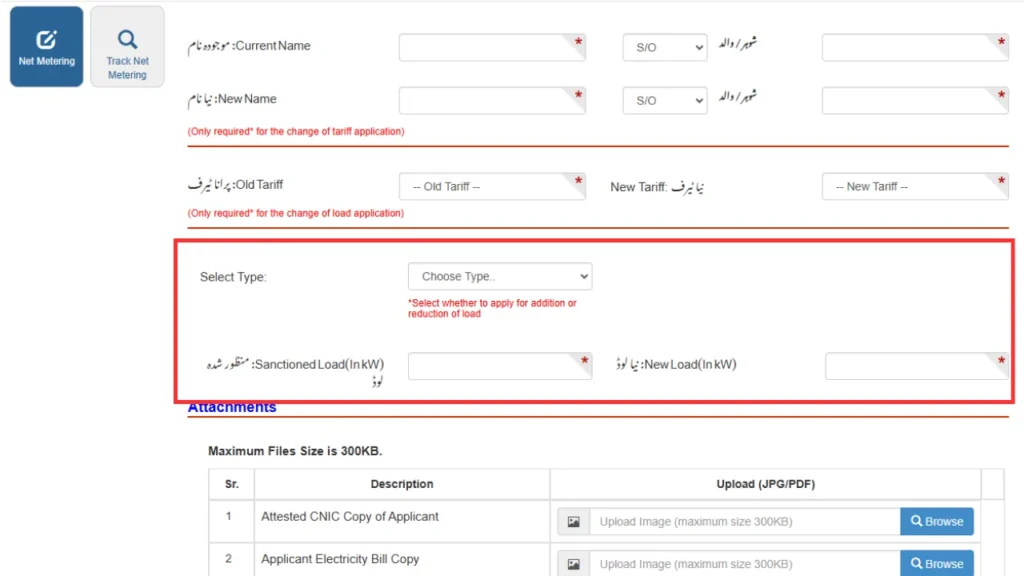
It’s very important to give correct information in this step. If there are any mistakes, your request might get delayed or even rejected.
Step 8: Upload Required Documents
To confirm your request, you need to upload clear and attested copies of these documents:
- Attested CNIC Copy: Your ID card with an official stamp to prove it’s real.
- Latest Electricity Bill: A recent bill for the connection where you want to change the name.
- Proof of Ownership: Papers like a sale agreement, property papers, or other legal documents that show you own the place and can request a name change.
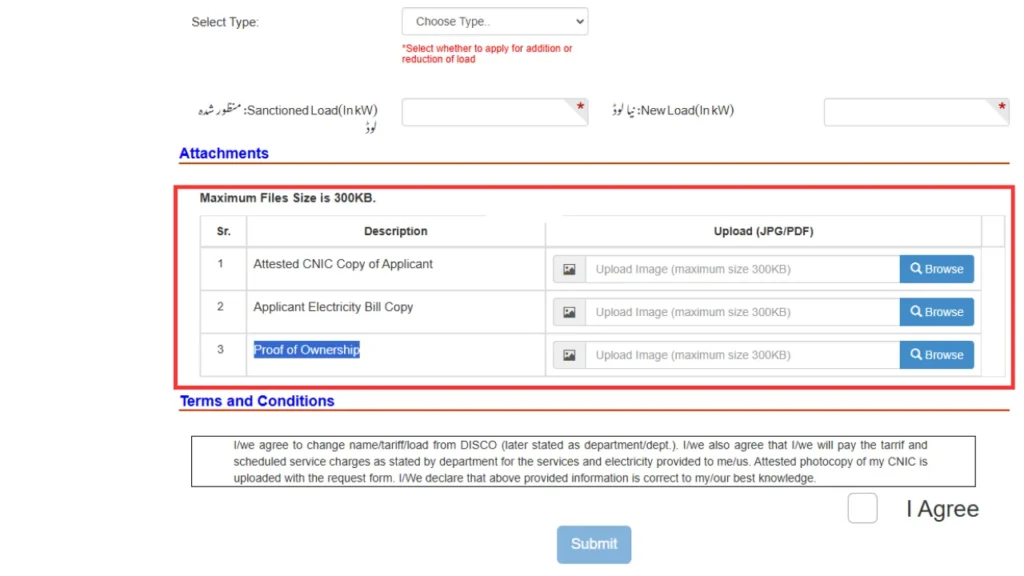
Make sure all documents are clear to read and properly attested (stamped or signed by an authorized person) before you upload them. This will help avoid any problems during the verification process.
Step 9: Agree and Submit
Before finishing your application, double-check all the information you added. Make sure everything is correct and the documents you uploaded are right. When you’re sure everything looks good, tick the box to agree to the terms and conditions. Then, click the Submit button to send your request.
After you submit the form, you will get a confirmation message and a tracking ID. You can use this tracking ID to check the status of your application.
More: